
Introduction
Transforming a simple garment into a personalized statement piece can feel overwhelming, but it doesn’t have to be. This guide will walk you through the process of applying patches in New Zealand, step by step, ensuring that you not only learn the best practices but also gain confidence in your ability to enhance your wardrobe.
You might wonder how to handle a patch that doesn’t stick or is misaligned. By addressing common challenges and providing practical solutions, this article will help you tackle patch application with ease and creativity.
With the right guidance, you’ll discover that applying patches can be a fun and rewarding experience.
Understand Different Types of Patches
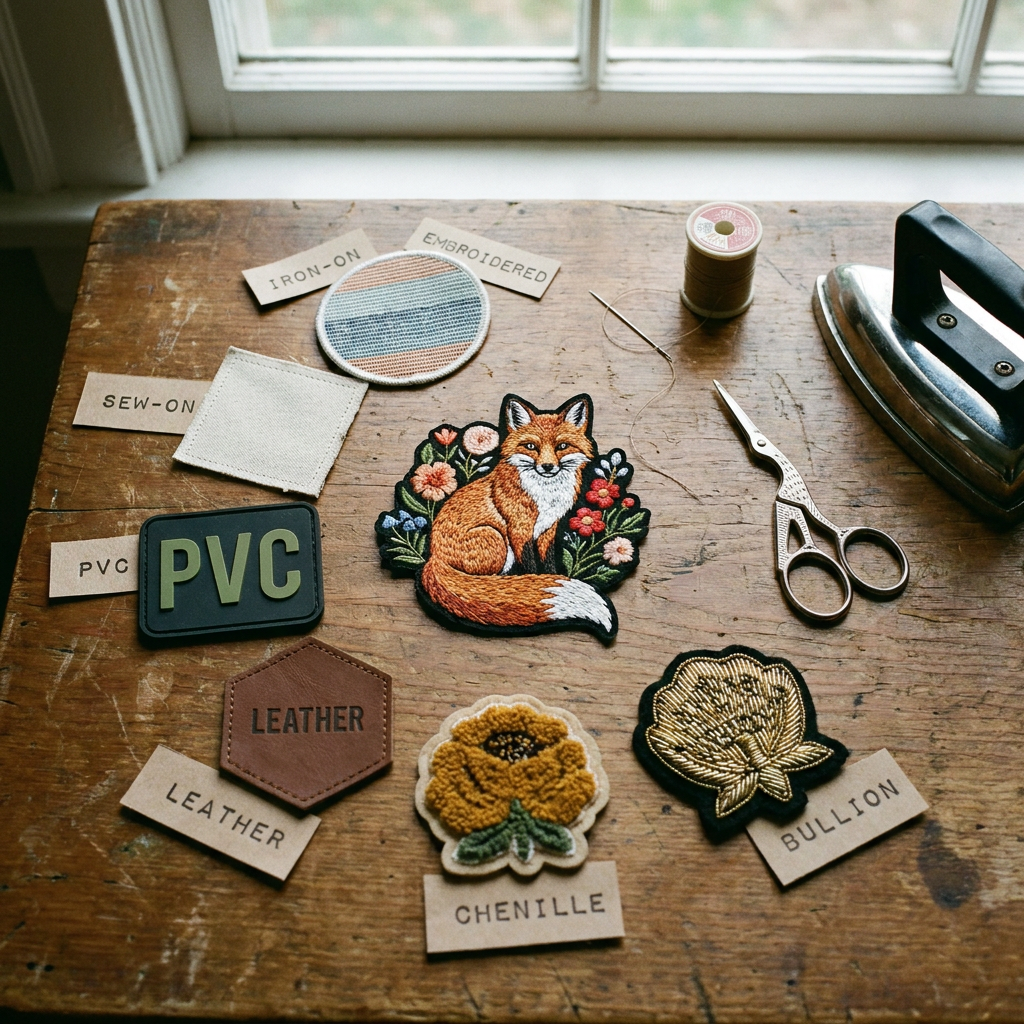
Choosing the right adhesive patch can feel overwhelming, especially with so many options available. Each type of patch serves a unique purpose, and understanding these can help you make the best choice for your needs.
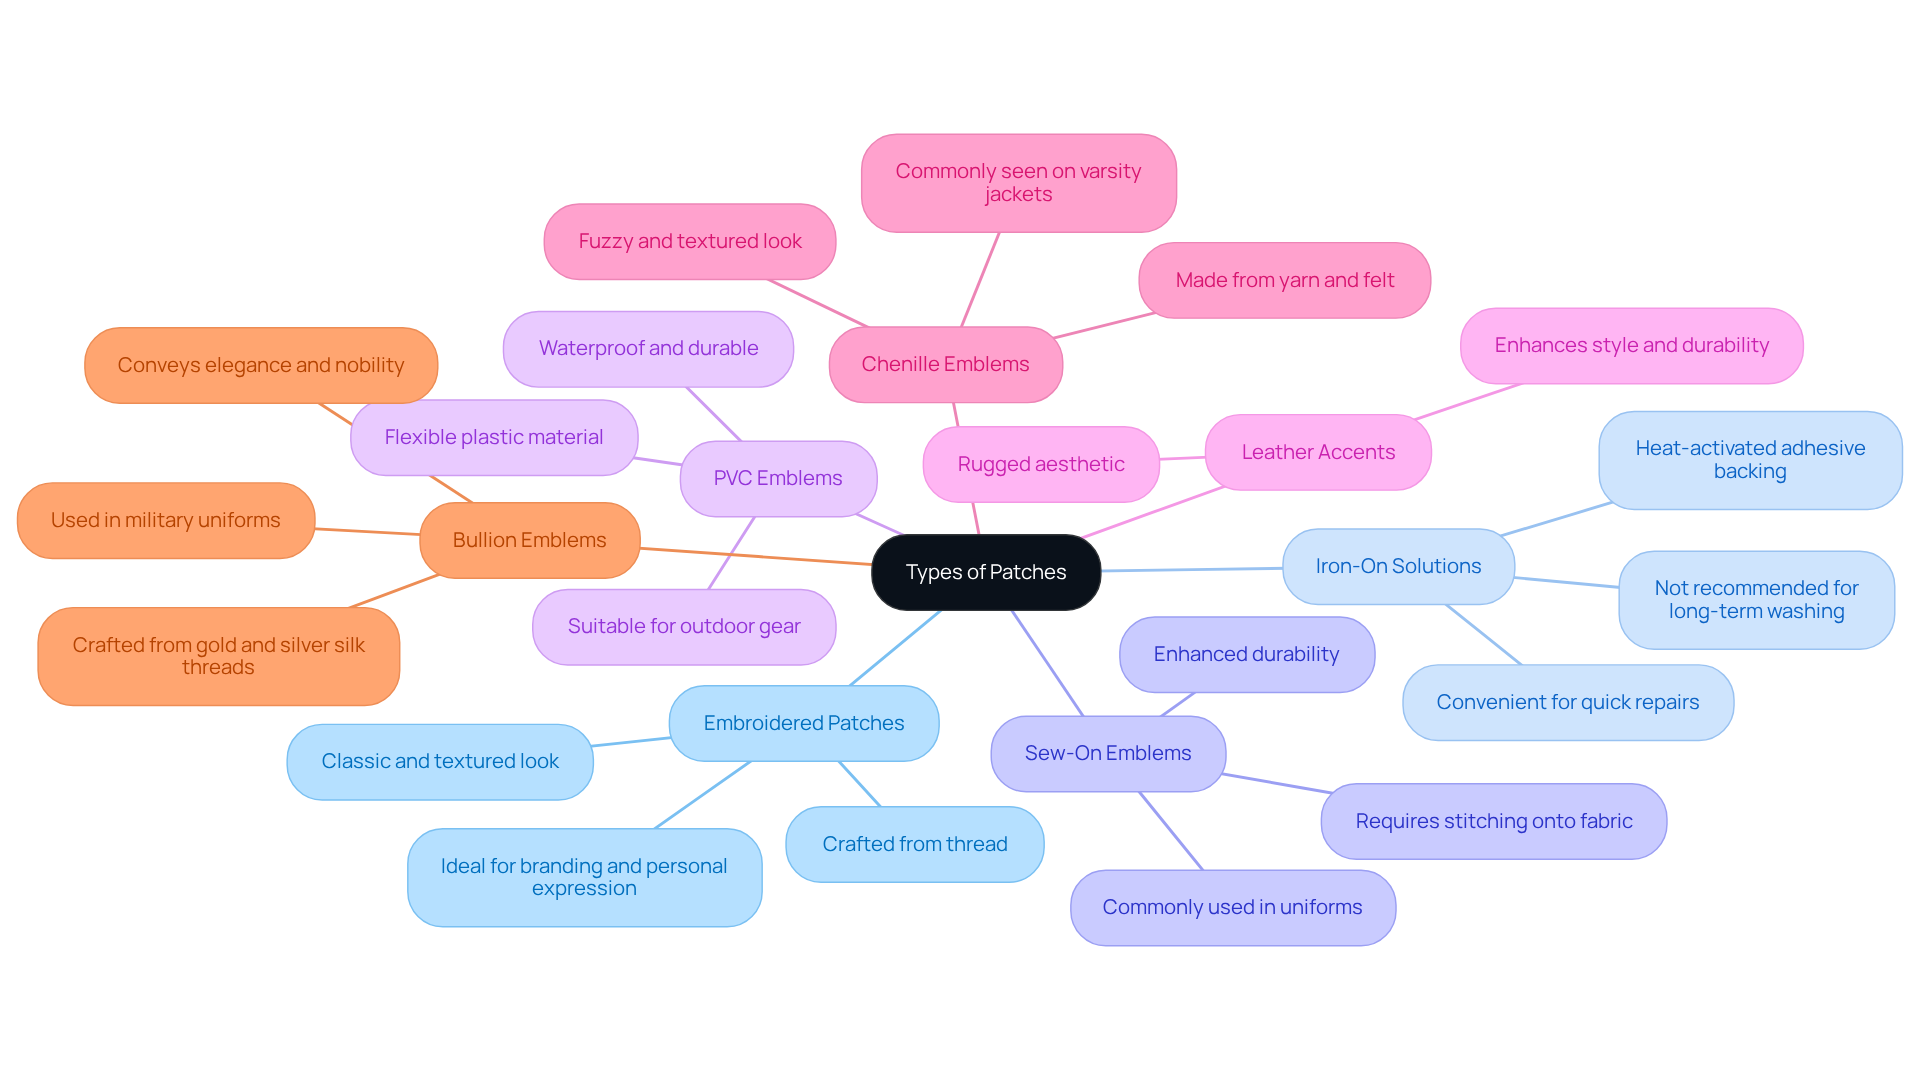
- Embroidered Patches: Crafted from thread, these patches add a classic and textured look to clothing. They’re perfect for branding and personal expression, allowing you to showcase your style.
- Iron-On Solutions: With a heat-activated adhesive backing, these patches can be easily applied with an iron. They offer a convenient option for quick repairs or embellishments, making your life a little easier.
- Sew-On Emblems: These require stitching onto the fabric, providing enhanced durability compared to iron-on options. They’re commonly used in uniforms and high-wear items, ensuring they stand the test of time.
- PVC Emblems: If you’re looking for something that can withstand the elements, PVC emblems are a great choice, as they’re both waterproof and durable. This makes them suitable for outdoor gear and apparel that must endure harsh conditions.
- Leather Accents: Adding a rugged aesthetic, leather accents are frequently used on jeans and jackets, enhancing both style and durability.
- Chenille Emblems: Made from a blend of yarn and felt, these emblems offer a fuzzy and textured look, often seen on varsity jackets and sports clothing.
- Bullion Emblems: Crafted from gold and silver silk threads, these emblems are often used in military uniforms and royal clothing, conveying elegance and nobility.
These fabric pieces can be customized with names or logos, coming in various shapes and sizes to suit your clothing and accessories needs. Understanding these types will assist you in choosing the appropriate patch for your project, whether for repairing a tear or adding a personal touch to your clothing. As you explore these options, remember that the right patch can not only repair but also elevate your style, reflecting who you are.
Prepare Your Garment and Tools
Repairing your favorite clothing can feel daunting, but with the right steps, it can be a rewarding experience.
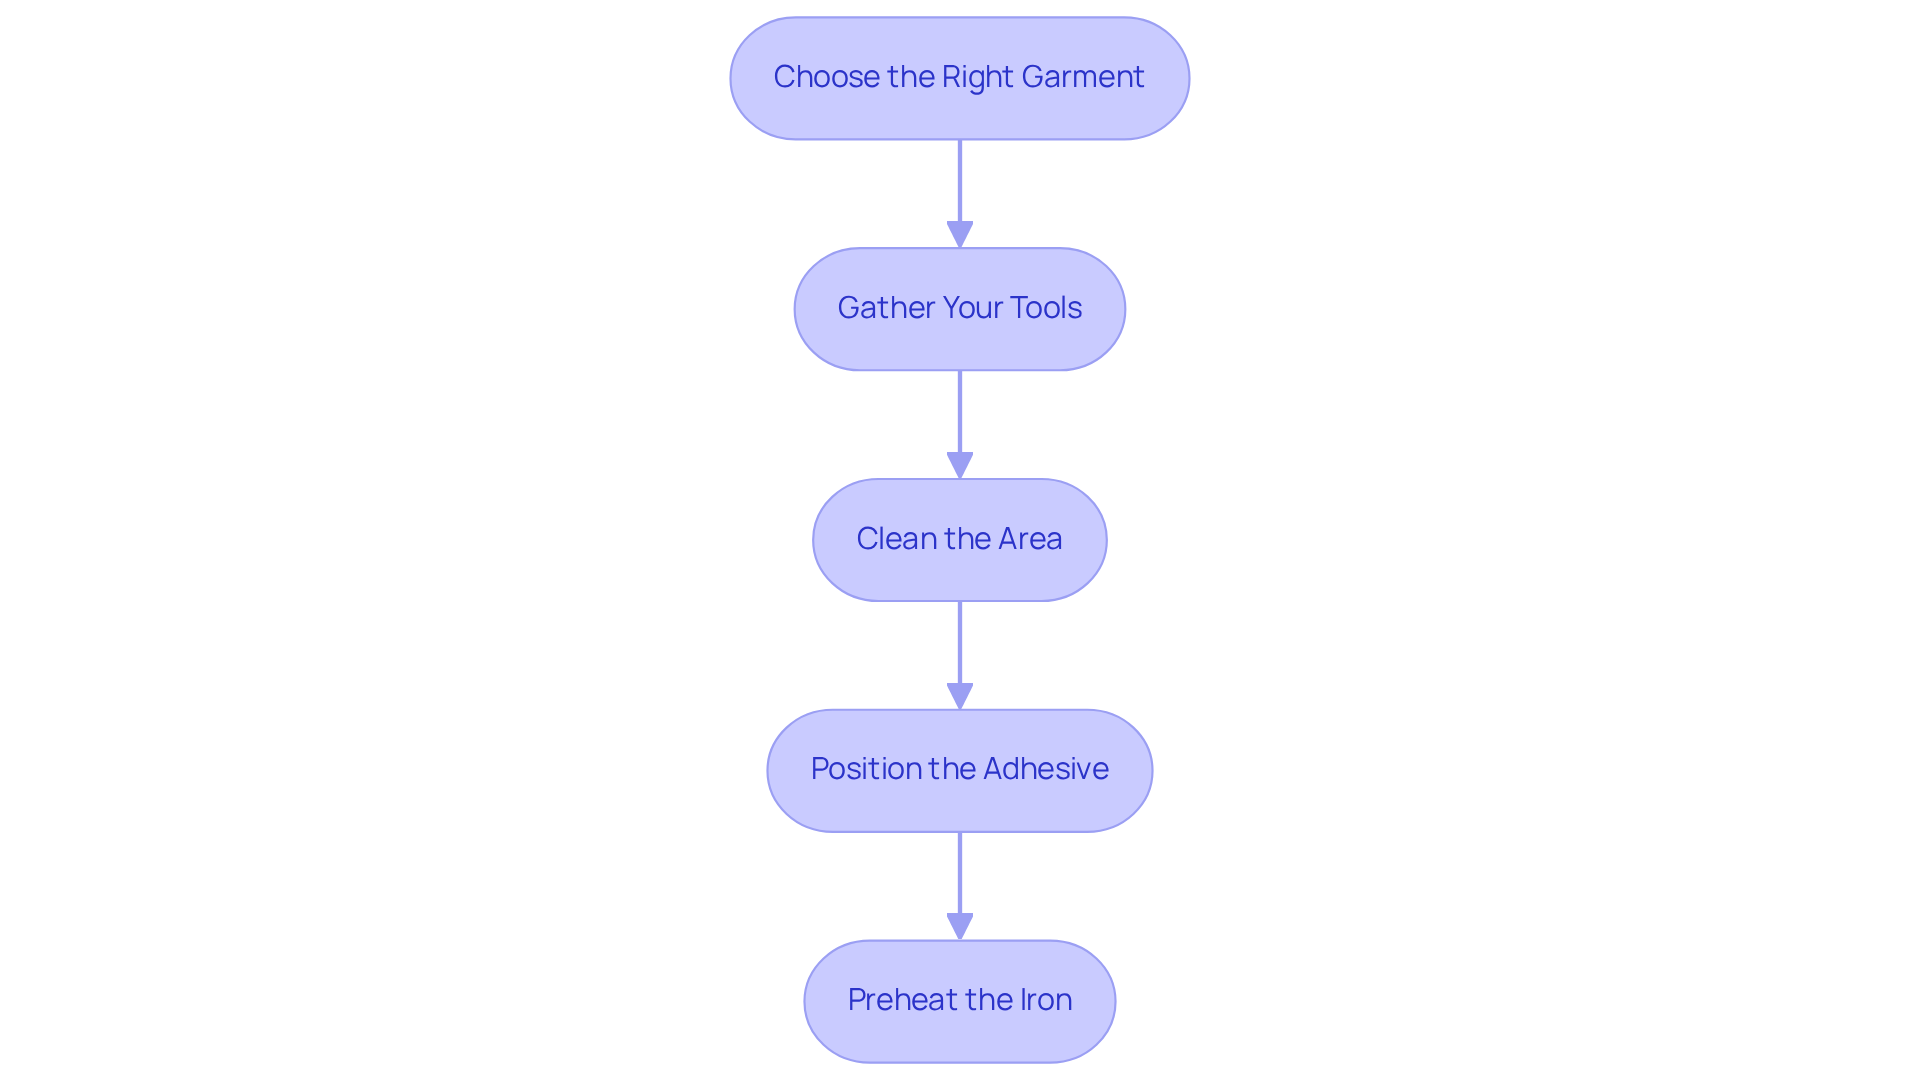
- Choose the Right Garment: Select a clean, dry item of clothing that you wish to repair. Did you know that keeping your garment clean is crucial for a successful repair? This ensures that the application adheres properly and maintains its integrity.
- Let’s Gather Your Tools: Prepare the necessary items, including an iron (for iron-on applications), a sewing needle and thread (for sew-on applications), scissors, and possibly fabric glue for temporary placement. Having a pressing cloth on hand for intricate designs can help prevent damage during application.
- Clean the Area: Ensure the location where the application will occur is free from dirt, oil, and moisture. A damp cloth can be used to wipe the surface if needed, as cleanliness is crucial for adhesion. It’s natural to feel anxious about damaging a beloved garment during repairs, but proper surface preparation can greatly improve the longevity of your repair.
- Position the Adhesive: Place the adhesive on the garment to determine its ideal placement. Utilizing adhesive can assist in temporarily securing it in position while you finalize the arrangement. Picture the joy of wearing a garment that reflects your personal style and creativity.
- Preheat the Iron: If you are using an iron-on transfer, set your iron to the appropriate temperature for the fabric type to ensure effective bonding. Following manufacturer instructions is key to achieving the best results.
With these preparations, you’re not just fixing a garment; you’re breathing new life into it, making it uniquely yours.
Apply the Patch: Step-by-Step Instructions
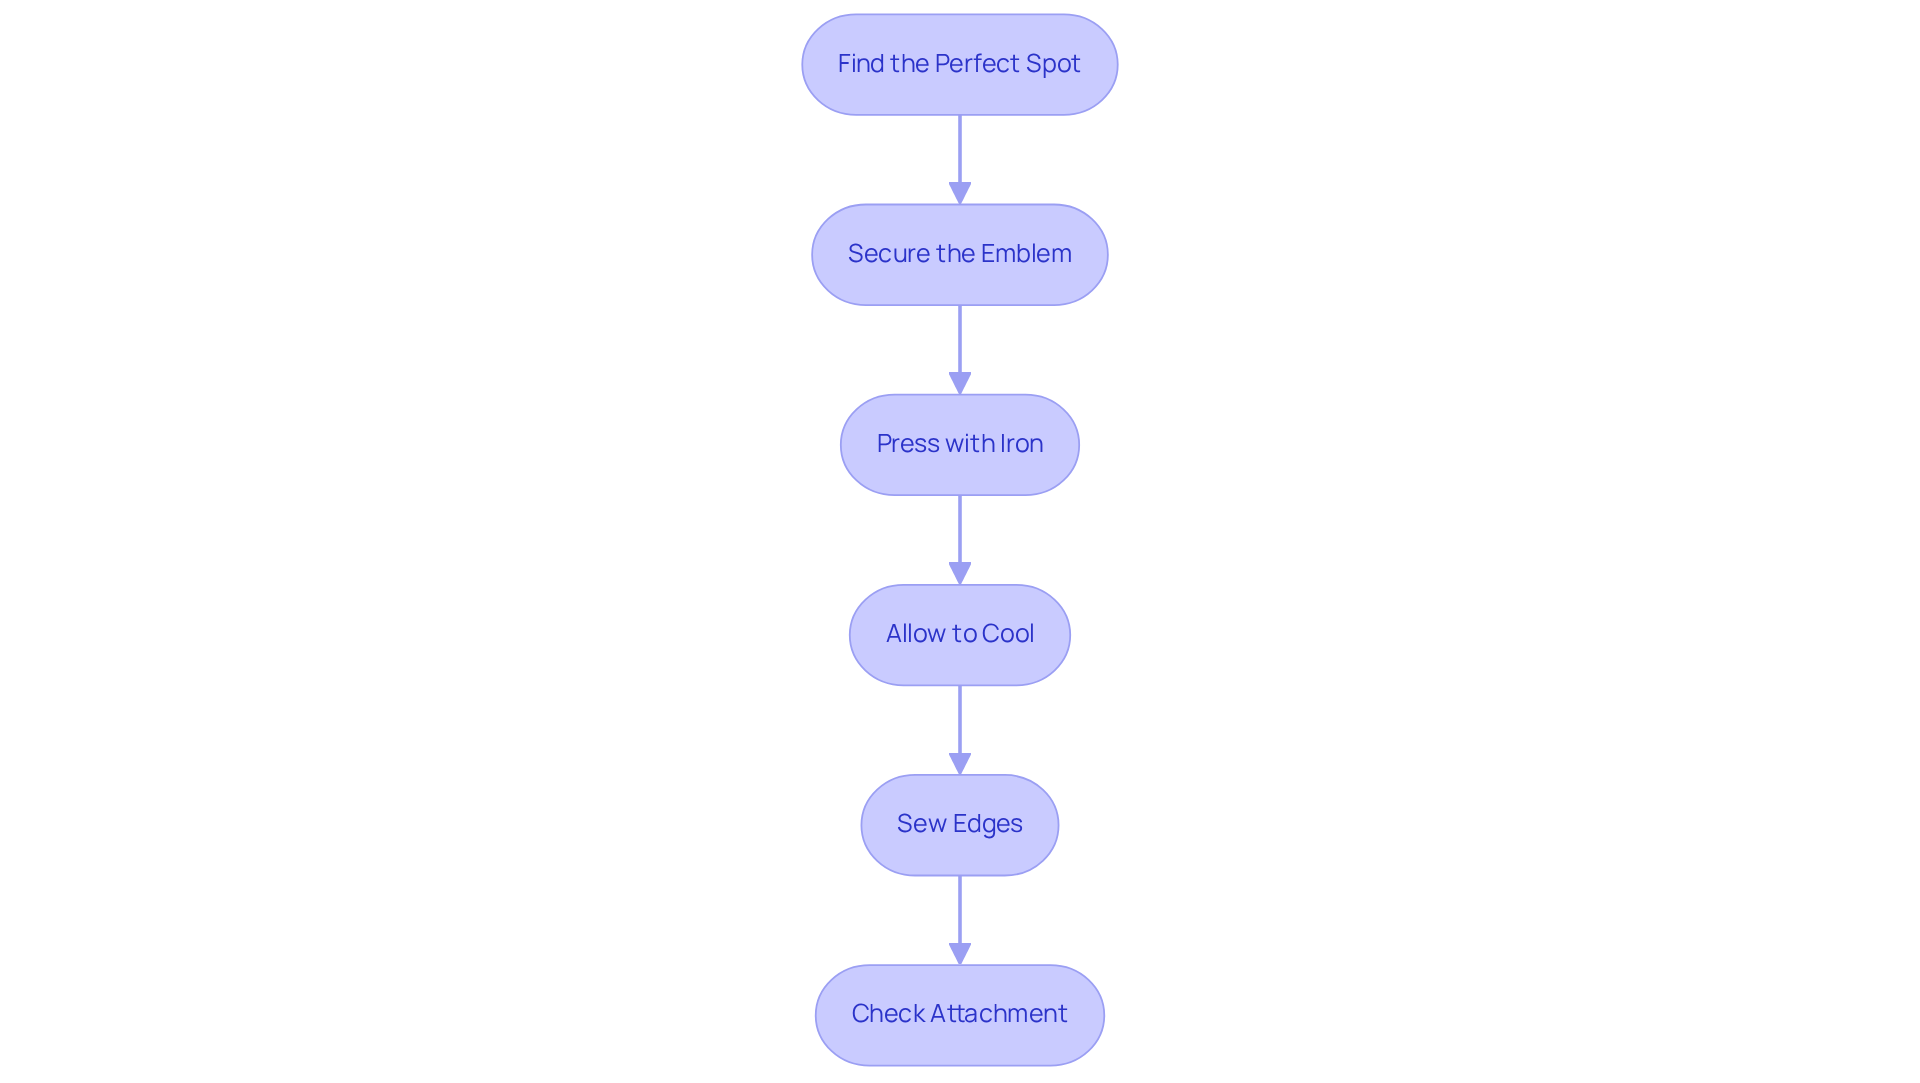
Applying an emblem to your garment can feel daunting, but with the right steps, it can be a smooth and rewarding process. Start by finding the perfect spot on your garment for the emblem; take a moment to ensure it’s straight and centered, as this will make all the difference in the final look. Next, let’s make sure the emblem is secure; if you’re using an iron-on, cover it with a thin cloth to protect it from direct heat. When you’re ready, gently press the iron down on the emblem for 20-30 seconds, ensuring even heat distribution for a strong bond. After applying heat, allow the emblem to cool completely; this step is crucial for ensuring a lasting hold. If you’re sewing the emblem on, take your time to stitch around the edges; this extra step adds durability and peace of mind. Finally, give your emblem a gentle tug to ensure it’s securely attached; if any edges are lifting, don’t worry-just reapply heat or sew them down for a lasting hold. Remember, it’s important to avoid applying the adhesive to areas with open cuts or sores; if you have any questions, don’t hesitate to reach out to your doctor or pharmacist for guidance. By taking these careful steps, you not only enhance your garment’s appearance but also ensure it lasts longer, giving you peace of mind.
Troubleshoot Common Application Issues
If you’re facing challenges with your patches nz application, you’re not alone; many people encounter similar issues.
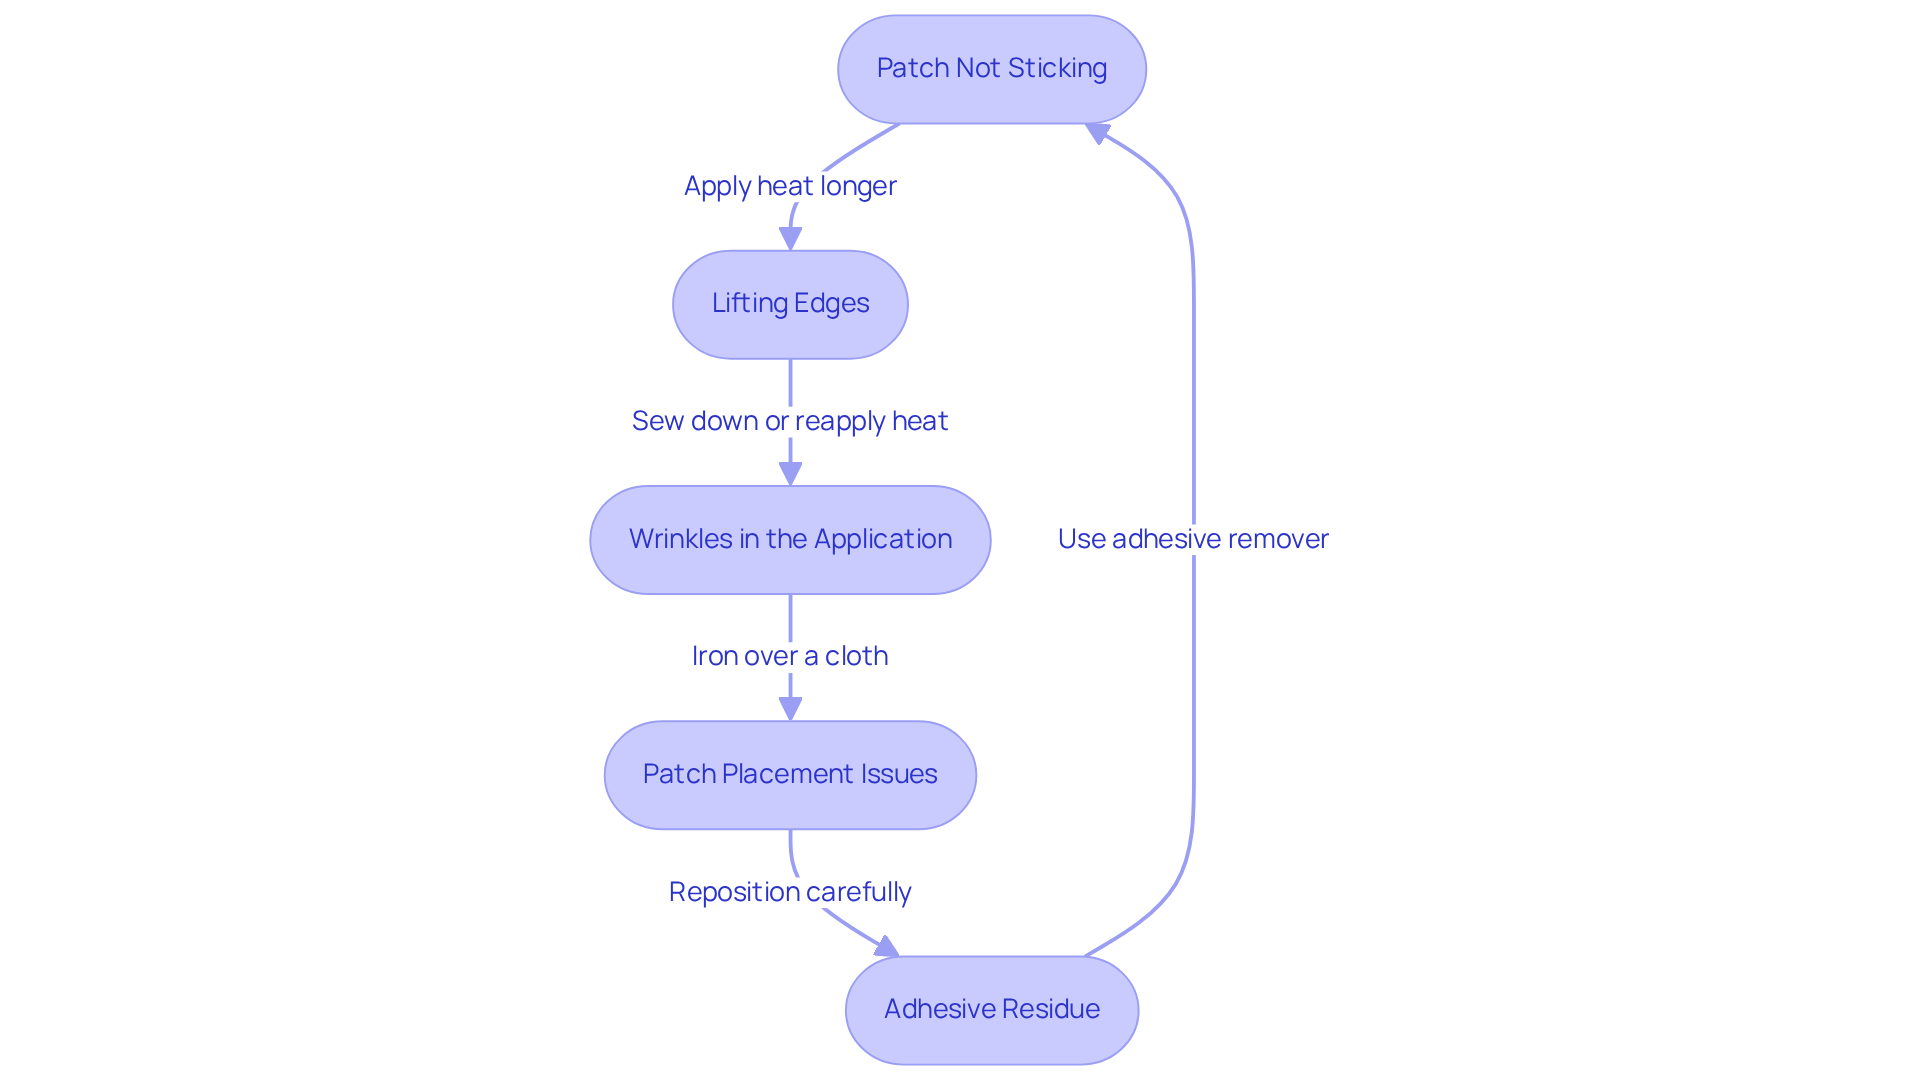
- Patch Not Sticking: If the adhesive isn’t sticking, try applying heat a bit longer. Remember, ensuring a proper bond is key to avoiding vulnerabilities that may arise from improper application.
- Lifting Edges: If the edges of the material are lifting, consider sewing them down for added security or carefully reapplying heat. Taking care of lifting edges is important; it helps ensure your patch stays effective.
- Wrinkles in the Application: If you notice wrinkles, gently iron over a cloth to smooth them out. Smooth surfaces are less likely to cause discomfort and ensure better contact with the skin.
- Patch Placement Issues: If the patch isn’t aligned correctly, carefully peel it off and reposition it. Be gentle to avoid harming the material. Getting the placement right helps your patch work its best.
- Adhesive Residue: If there’s adhesive residue left on the textile, use a textile-safe adhesive remover to clean it up. This will help preserve the integrity of the fabric and ensure future uses are successful.
By following these troubleshooting tips, you can effectively resolve common issues and ensure your patches nz are used successfully. By taking these steps, you can ensure your patch works effectively, bringing you the comfort and support you deserve.
Conclusion
Have you ever felt disheartened by a tear in your favorite clothing, unsure of how to fix it while still expressing your unique style? Choosing the right patch and applying it correctly can truly transform your garments, allowing for both repair and personal expression. This guide walks you through the different types of patches, from embroidered to iron-on, helping you find the perfect match for your needs and enhancing your style.
The step-by-step instructions outlined here emphasize the importance of preparation, proper application techniques, and troubleshooting common issues. By following these guidelines, anyone can successfully apply patches, ensuring a secure and aesthetically pleasing result. Whether it’s a simple repair or a creative embellishment, the right approach can breathe new life into your clothing.
Remember, patching isn’t just about repairs; it’s a wonderful way to express who you are. As you personalize your wardrobe, each patch becomes a reflection of your individuality and creativity. So gather your tools, choose your patches wisely, and enjoy the rewarding experience of making your clothing truly your own.
Frequently Asked Questions
What are embroidered patches?
Embroidered patches are crafted from thread and provide a classic, textured look to clothing. They are ideal for branding and personal expression, allowing individuals to showcase their style.
How do iron-on patches work?
Iron-on patches feature a heat-activated adhesive backing that allows them to be easily applied with an iron. They offer a convenient solution for quick repairs or embellishments.
What are the benefits of sew-on emblems?
Sew-on emblems require stitching onto the fabric, which provides enhanced durability compared to iron-on options. They are commonly used in uniforms and high-wear items, ensuring they last longer.
What are PVC emblems and their advantages?
PVC emblems are waterproof and durable, making them suitable for outdoor gear and apparel that must withstand harsh conditions.
How do leather accents enhance clothing?
Leather accents add a rugged aesthetic and are frequently used on jeans and jackets, enhancing both style and durability.
What are chenille emblems?
Chenille emblems are made from a blend of yarn and felt, offering a fuzzy and textured look. They are often seen on varsity jackets and sports clothing.
What are bullion emblems used for?
Bullion emblems are crafted from gold and silver silk threads and are often used in military uniforms and royal clothing, conveying elegance and nobility.
Can patches be customized?
Yes, these fabric patches can be customized with names or logos and come in various shapes and sizes to suit different clothing and accessory needs.
List of Sources
- Understand Different Types of Patches
- 9 different types of patches | ClothingLabels.cn (https://clothinglabels.cn/different-types-of-patches)
- Different Types of Patches for Custom Apparel | All-County Apparel (https://allcountyapparel.com/different-types-of-patches-for-custom-apparel)
- Embroidered Badges and Patches Market Share, Trends | 2035 (https://businessresearchinsights.com/market-reports/embroidered-badges-and-patches-market-119008)
- Clothing Label Industry Statistics & Market Data (2026) | QWL (https://qualitywovenlabels.com/industry-statistics)
- Prepare Your Garment and Tools
- 3 Quick and Easy Ways to Attach Embroidered Patches (https://laughinglizards.com/blogs/blog/easy-ways-to-attach-embroidered-patches-on-clothes?srsltid=AfmBOorivxignfu5btAmSZ5U1MAwTeM_4sRf6cUKjgoAzOFf4AySXwJ5)
- Patch It Up: The Ultimate Guide to Attaching Patches to Your Garments (https://andsons.us/blogs/news/patch-it-up-the-ultimate-guide-to-attaching-patches-to-your-garments?srsltid=AfmBOopqy5j3FVD2yK9l06LziFum2aO8C2XhEf8T1JfhUBh7sn7kMlhj)
- Clothing Label Industry Statistics & Market Data (2026) | QWL (https://qualitywovenlabels.com/industry-statistics)
- How to apply iron-on patches? (https://patchy.co/pages/tutorial-ironing-a-patch-onto-clothing?srsltid=AfmBOorNhGXvhDsUJck-_SIiQUv00nDmtlmSx_V7W8VPI4GBA1_k-zNS)
- Iron-On Patches: How to Apply Them Without Ruining Your Fabric. (https://ahoykollektiv.com/blogs/news/iron-on-patches-how-to-apply-them-without-ruining-your-fabric)
- Apply the Patch: Step-by-Step Instructions
- An Easy Guide for the Perfect Patch Placement: DIY Tips and Tricks for (https://patchcollection.com/blogs/news/an-easy-guide-for-the-perfect-patch-placement-diy-tips-and-tricks-for-application?srsltid=AfmBOorM2WDuP59_mKtHLAGw9npqoNmxZ4MK5fg_indzYsfLbj8LzQTV)
- Wearable patch can painlessly deliver drugs through the skin (https://news.mit.edu/2023/wearable-patch-can-painlessly-deliver-drugs-through-skin-0419)
- MSP Patch Management Statistics: USA 2025 / Infrascale (https://infrascale.com/msp-patch-management-statistics-usa)
- Transdermal Patches: How to Apply Them (https://healthline.com/health/general-use/how-to-use-transdermal-patch)
- Using transdermal patches safely in healthcare settings (https://sps.nhs.uk/articles/using-transdermal-patches-safely-in-healthcare-settings)
- Troubleshoot Common Application Issues
- 10 Patch Management Metrics Every IT Team Should Track (https://splashtop.com/blog/patch-management-metrics)
- Troubleshooting patch deployment failures on Windows – BMC Helix Documentation (https://docs.helixops.ai/bin/Automation-DevSecOps/Server-Automation/TrueSight-Server-Automation/tssa262/Troubleshooting/Troubleshooting-by-component-or-functional-area/Troubleshooting-Patch-Management-issues/Troubleshooting-Windows-patch-management-issues/Troubleshooting-patch-deployment-failures-on-Windows)
- Troubleshooting Patch Deployment Errors | Endpoint Central (https://manageengine.com/products/desktop-central/help/patch_management/patch-deployment-troubleshooting.html)
- MSP Patch Management Statistics: USA 2025 / Infrascale (https://infrascale.com/msp-patch-management-statistics-usa)